The goal of this lesson is to use VS Code and its automated code generation tool to create a new robot project, add our own custom code, build that program, and deploy it to a robot!
You will also publish this code to your GitHub account.
Don't worry if you can't code (yet). This exercises is about getting familiar with the tools you'll be using.
If you used the PC installer, it should have a shortcut link on the desktop top run VS Code.
Next open a new window by pressing Ctrl+Shift+N (or Command+Shift+N on the mac)
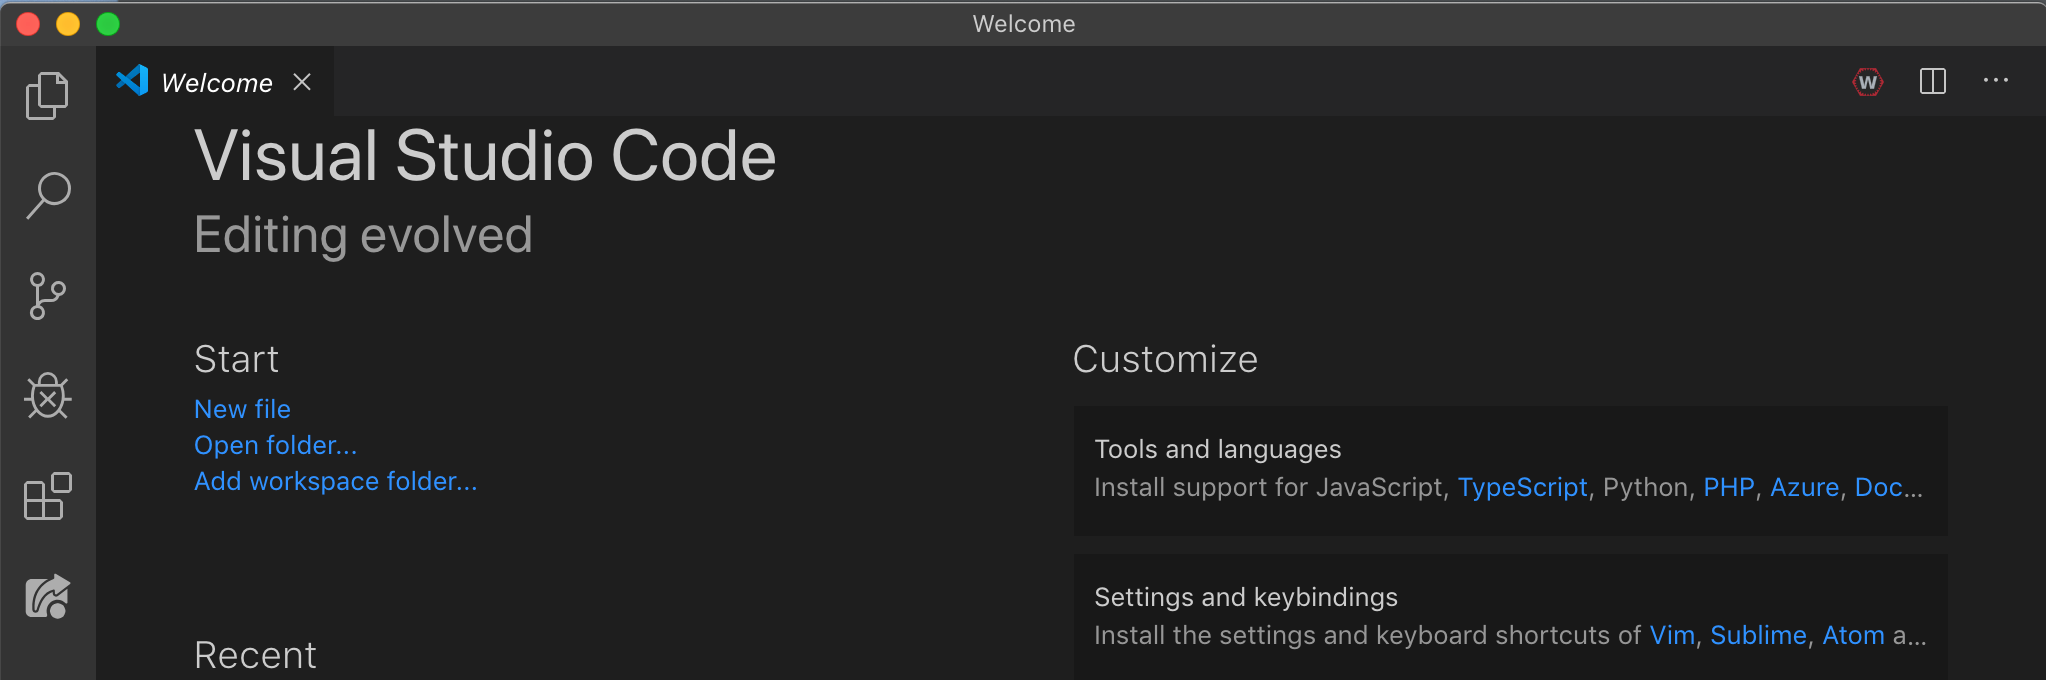
2. Press Control+Shift+P (or it may be Command+Shift+P on a Mac) This will open the Command Palette. Or just click on the "W" in a red hexagon icon in the upper right corner.
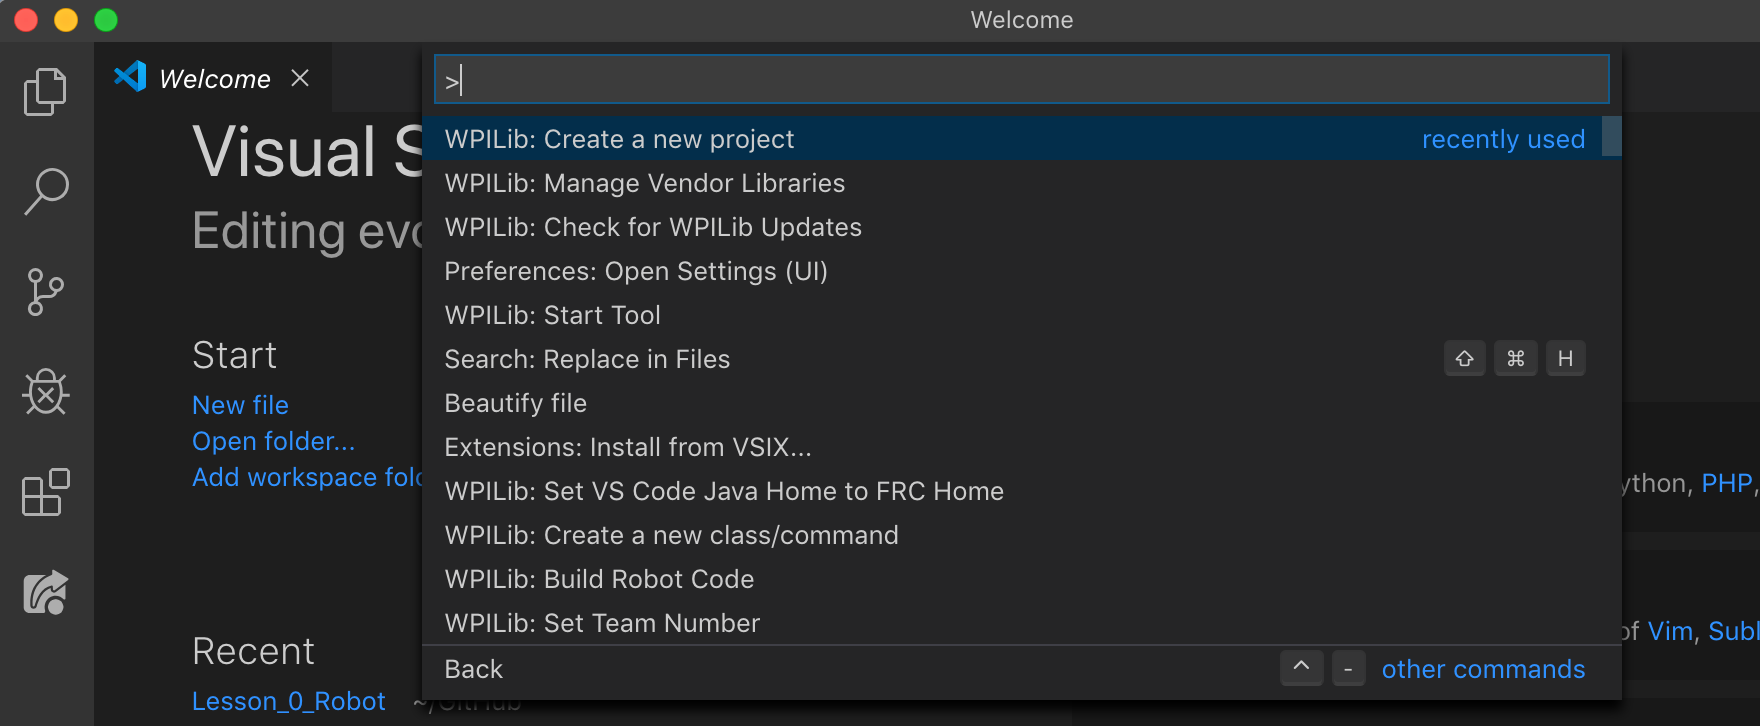
This is a text window where you can execute commands to build code, update vendor libraries, set your team number, change the the Java library path, and many other tasks. Most of the time it's easier to just click on menu, files, and icons, but sometimes the command palette is the easiest way and sometimes the only way to run certain commands.
The command Palette will try to auto-complete and guess what command. So you can just type "new project" for instance and then select "WPILib: Create a new project" from the list of suggestions.
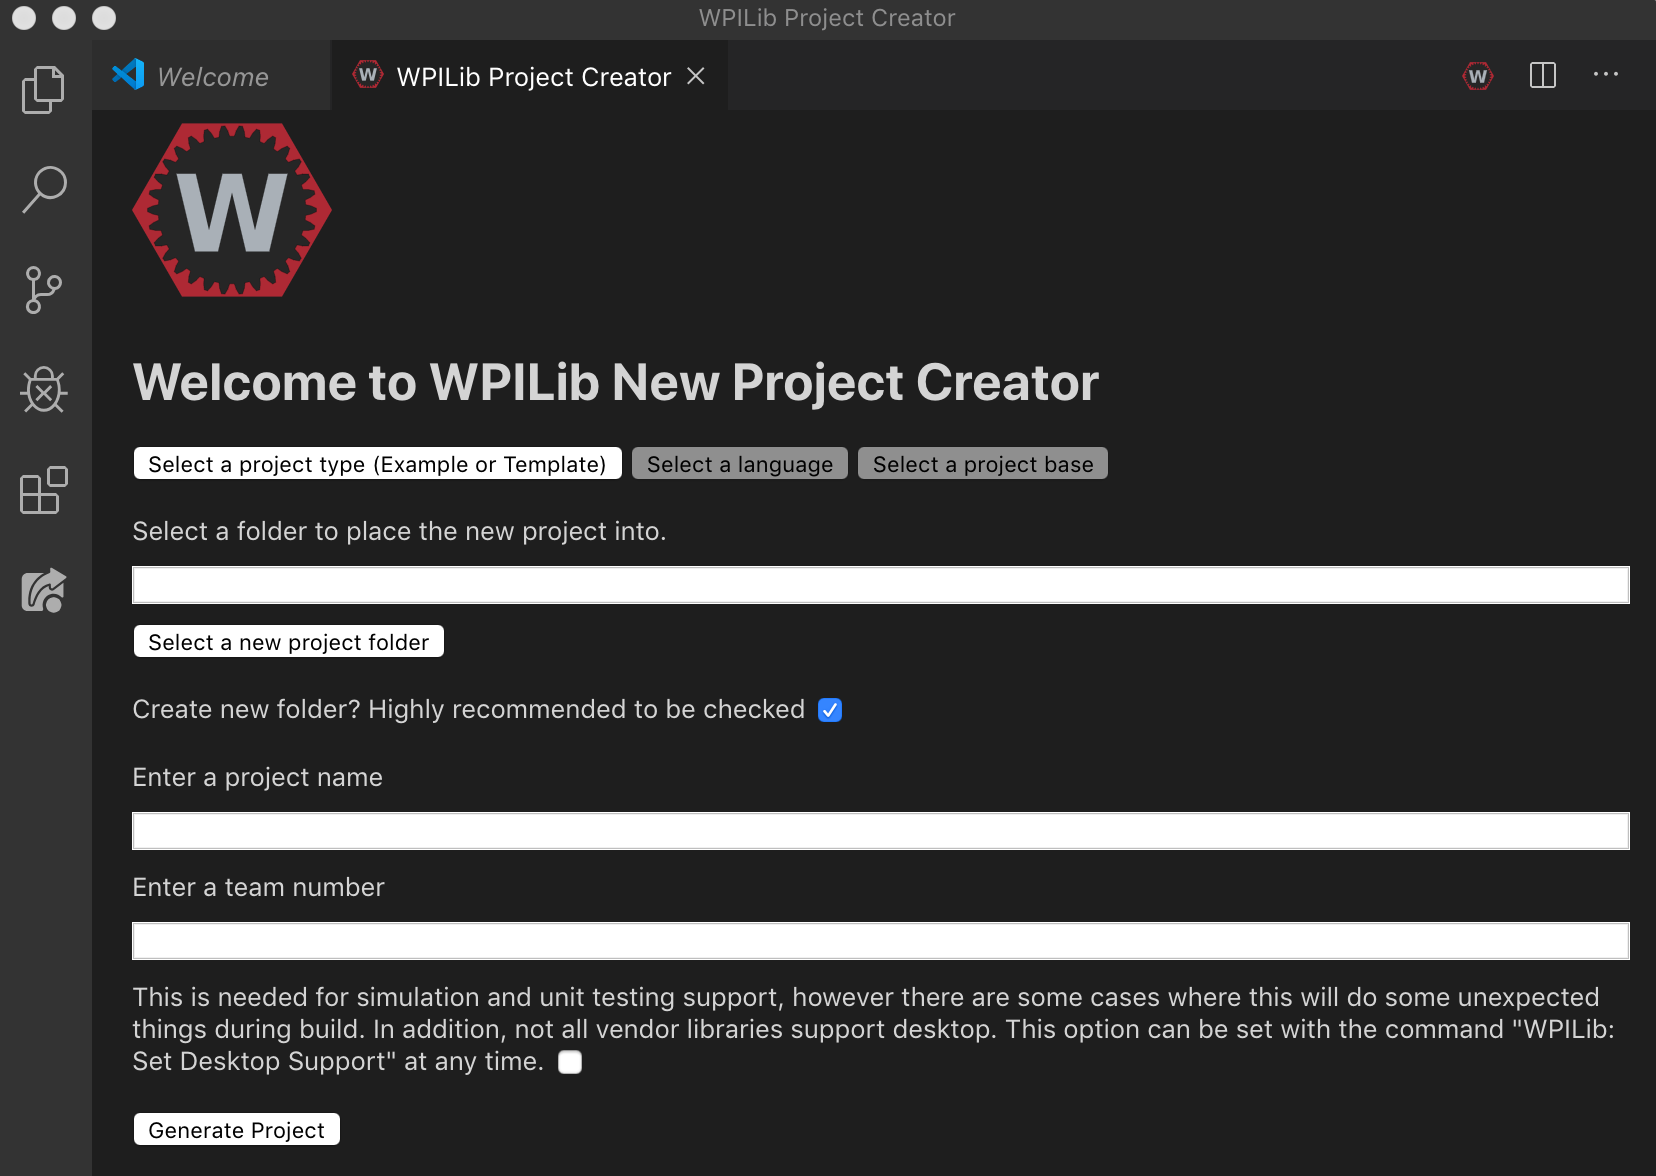
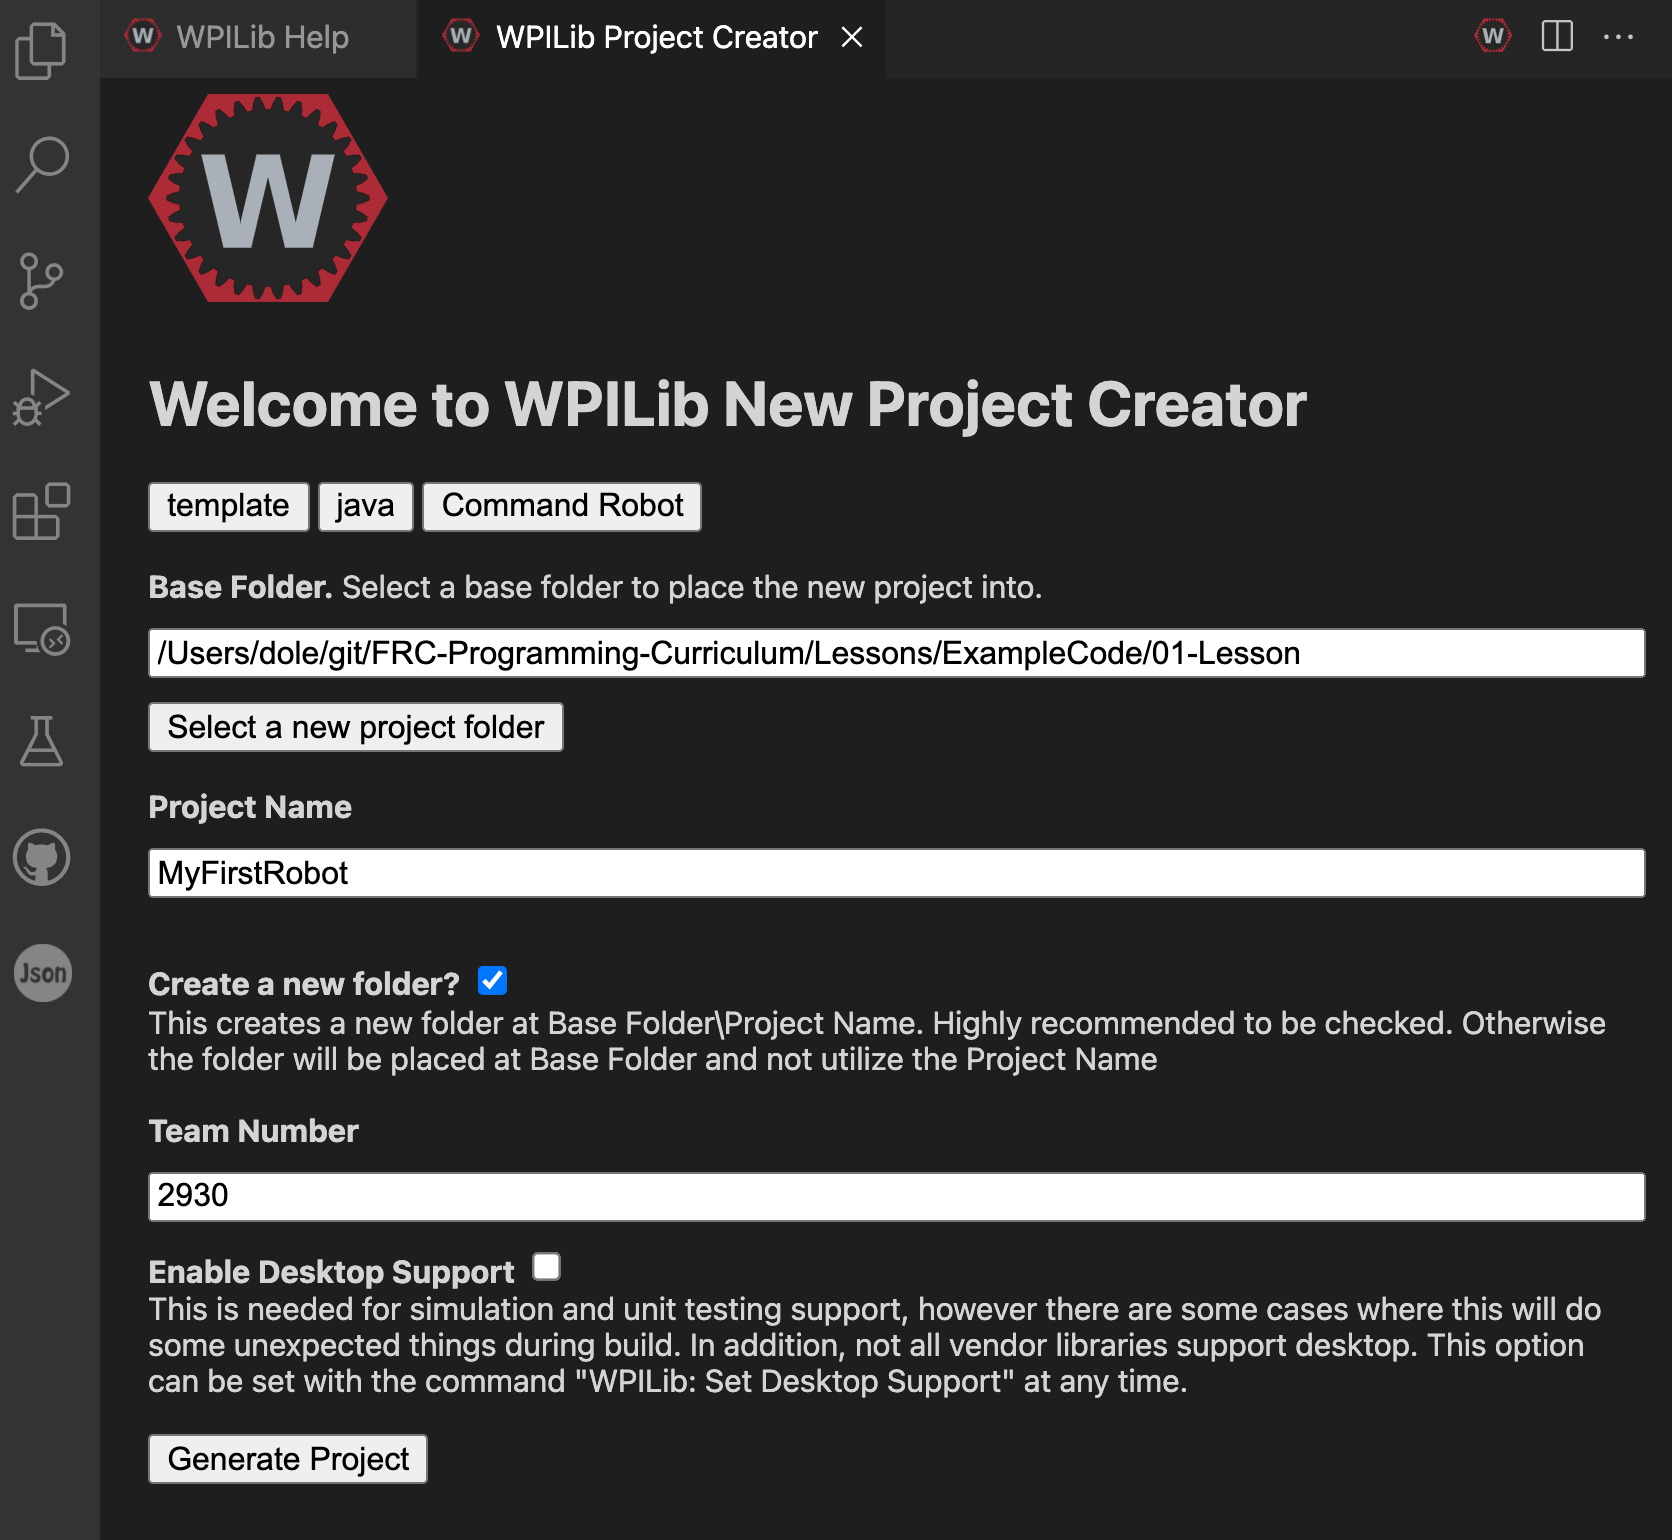
Work your way through the options, feel free to explore, but for this lesson select:
  Project Type: Template
  Language: Java
  Project Base: Command Robot
  Project Name: MyFirstRobot
  Team Number: 2930
Select a folder to place your project into. This should be your local "GitHub" directory, for instance your "Documents/GitHub" directory that you set up in lesson 0. This should NOT include the name of your project, that directory will get automatically created when you click the "Generate Project" button at the bottom.
Then click on "Generate Project"
VS Code will ask you if you want to open the project. Select "Yes (Current Window)"
Things should look like this:
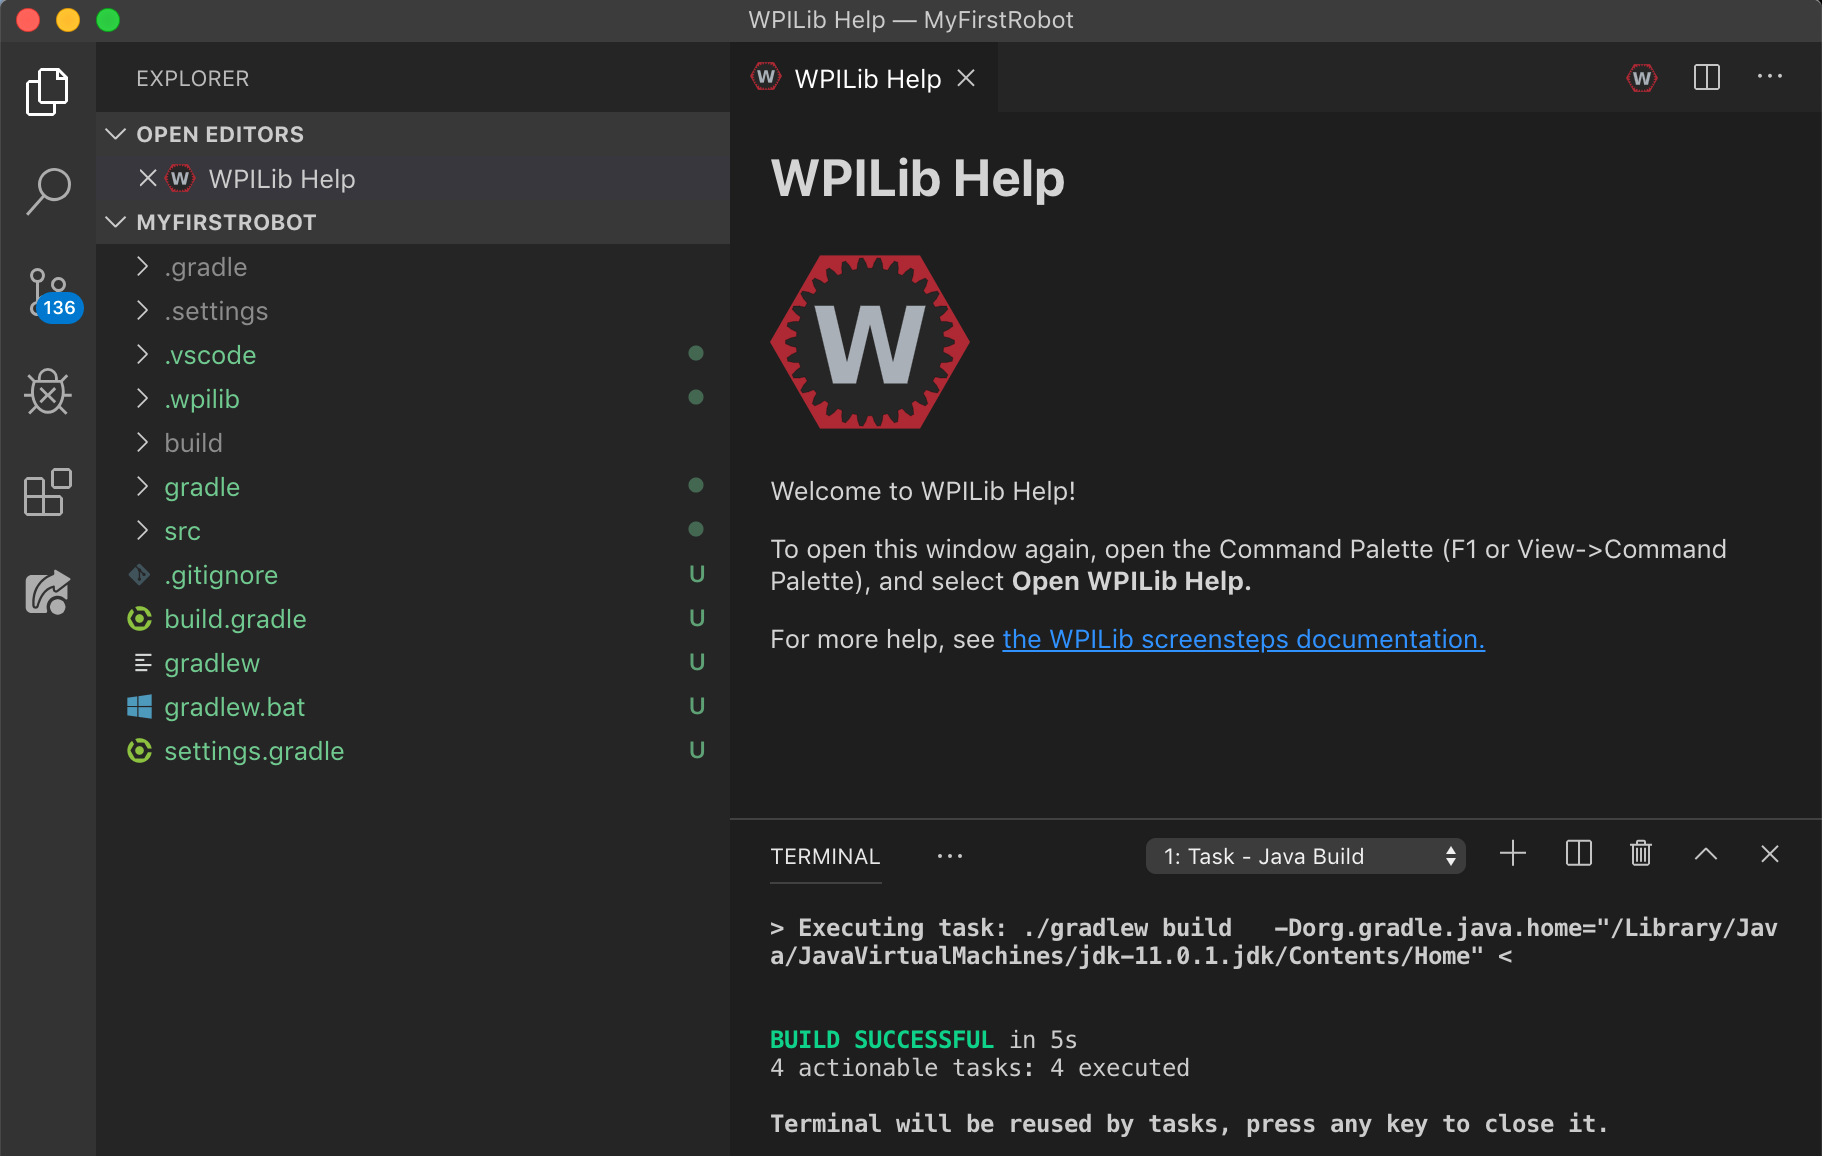
This is a great time to start using GitHub. For instructions on creating your first GitHub repo see the GitHub Lesson 1.
Next you will customize the code so it works with your robot. If you get stuck, consult the reference MiniBot Code in the team's Github repo.
The outline of the steps will be:
- Install required vendor code to control motors.
- Create a subsystem to control the drivetrain motors.
- Instantiate a class to get user input from an XboxController.
- Create a command that takes input from the Xbox controller and tells the drivetrain to move the robot.
- Build and deploy the code to the robot.
- Drive a robot!
Most robots use motor and controls electronics from Rev Robotics, Cross the Road Electronics or both. Each of these vendors for FRC parts provide their own code for controlling their respective electronics. These are not included in your WPILib installation by default and must be added to your code repository before you can use them.
For this project we will be using REV Neo motors for our simple robot. So we will add the REV Robotics vender dependency. These vender dependency files get put in the venderdeps directory in your code repo.
We will want to add the REV vender dependency file from https://software-metadata.revrobotics.com/REVLib.json you can copy it by hand, or follow the instructions on installing vender dependencies.
NOTE: Vender libraries are updated each competition year and sometimes mid season, so confirm you are installing the latest version.
Open the file Constants.java and edit it to look like this:
public final class Constants {
    public static final class DriveConstants {
        public static final int LEFT_NEO_CANID = 2;
        public static final int RIGHT_NEO_CANID = 1;
        public static final int DRIVECONTROLLER_ID = 0;
    }
}
The full file is MinBot Constants.java
Subsystems are Java classes that control a specific part of the robot. Read the WPIlib documenation on subsystems for more detailed information. They have a very good explanation.
The first, and most important, subsystem for any robot is for the drivetrain. Otherwise we have a robot that can't move, and a stationary robot isn't very useful.
Open src/main/java/frc/robot/Robot.java and scroll down to the function robotInit()
- create
Drivetrain.javasubsystem in subsystem folder - edit
Drivetrain.javato have
- two motors, using the CANSparkMax class
- create a DifferentialDrive class
Create the Drivetrain.java file, but right clicking (or Ctr-clicking if you're using a Mac) the subsystems directory name in VSCode's file explorer. Then select the Create new class/command option. In the selector box that appears, type in Subsystem and make sure to select Subsystem (new). Next it will ask you for a name for the new subsystem, this will be both the name of the file and the name of the class that is created. Classes should always start with a capital letter. Type Drivetrain into the box and continue.
Now a file names Drivetrain.java will appear in your subsystem folder. Click on it to open it (if it isn't already) and edit it as follows.
public class DriveSubsystem extends SubsystemBase {

  private static CANSparkMax leftNEO;
  private static CANSparkMax rightNEO;
  private static MotorController leftSide;
  private static MotorController rightSide;
  private static DifferentialDrive drive;

  public DriveSubsystem() {
    leftNEO = new CANSparkMax(Constants.DriveConstants.LEFT_NEO_CANID, MotorType.kBrushless);
    rightNEO = new CANSparkMax(Constants.DriveConstants.RIGHT_NEO_CANID, MotorType.kBrushless);

    // set all NEOs to factory defaults
    leftNEO.restoreFactoryDefaults();
    rightNEO.restoreFactoryDefaults();

    // assign each motor to a MotorControllerGroup
    leftSide = new MotorControllerGroup(leftNEO);
    rightSide = new MotorControllerGroup(rightNEO);

    // create our DifferentialDrive class
    drive = new DifferentialDrive(leftSide, rightSide);
  }
Next we will add methods to drive the robot. We will add two options, a tank drive method and an arcadeDrive
  public void arcadeDrive(double xSpeed, double zRotation) {
    drive.arcadeDrive(xSpeed, zRotation);
  }

  public void tankDrive(double leftSpeed, double rightSpeed) {
    drive.tankDrive(leftSpeed, rightSpeed);
  }
As you type VSCode will suggest autocompletions for classes, functions, and variables. You can select them with the mouse, or hit tab if the correct suggestions is at the top of the list. This is a great way to cut down on typing and to avoid typos. VSCode will also helpfully add import directives at the top of your Java class. The imports tell Java what external class definitions are being used in this file. Double check to make sure all of the following imports appear at the top of Drivetrain.java.
package frc.robot.subsystems;

import edu.wpi.first.wpilibj2.command.SubsystemBase;
import frc.robot.Constants;

import com.revrobotics.CANSparkMax;
import com.revrobotics.CANSparkMaxLowLevel.MotorType;

import edu.wpi.first.wpilibj.drive.DifferentialDrive;
import edu.wpi.first.wpilibj.motorcontrol.MotorController;
import edu.wpi.first.wpilibj.motorcontrol.MotorControllerGroup;
Lastly, we need to instantiate our drivetrain class so our robot can use it. Open RobotContainer.java and edit it to add the line to create the m_driveSubsystem variable.
public class RobotContainer {
  // The robot's subsystems and commands are defined here...
private final DriveSubsystem m_driveSubsystem = new DriveSubsystem();Next we will add a XBOX controller to RobotContainer.java. Add a line to create a m_driveController variable.
public class RobotContainer {
  // The robot's subsystems and commands are defined here...
  private final DriveSubsystem m_driveSubsystem = new DriveSubsystem();

  /**
   * The container for the robot.  Contains subsystems, OI devices, and commands.
   */
public static XboxController m_driveController = new XboxController(DriveConstants.DRIVECONTROLLER_ID);We have a subsystem to control the driving motors and we have user input from the Xbox controller. Now we just need to connect the two, so when a user pushes on the Xbox joysticks the robot moves. For this we will create a command.
Similar to creating a new subsystem, right click on the commands directory and select Create new class/command and this time select Command (new) and name the new class DriveCommand. Open the file and edit it so that it looks like this:
public class DriveCommand extends CommandBase {
  private DriveSubsystem m_driveSubsystem;
  private XboxController m_driveController;

  /**
   * Creates a new DriveCommand.
   */
  public DriveCommand(DriveSubsystem driveSubsystem, XboxController driveController) {
    m_driveSubsystem = driveSubsystem;
    m_driveController = driveController;
    // Use addRequirements() here to declare subsystem dependencies.
    addRequirements(driveSubsystem);
  }
Lastly we need to tell the robot to run our command when it starts up. We do this by setting the DriveSubsystem's default command. Edit RobotContainer.java to look like this:
  public RobotContainer() {
    // Configure the button bindings
    configureButtonBindings();
    m_driveSubsystem.setDefaultCommand(new DriveCommand(m_driveSubsystem, m_driveController));
  }
Now you're ready to test your code!
You may have noticed that all the reference code for this project has removed all the references to ExampleSubsystem and ExampleCommand. This can be done by just deleting the two corresponding .java files and all the lines of code that reference them. However this will leave you with one error having to do with the assignment of the autonomous command. It's too early to get into that here, but just edit the getAutonomousCommand function to be the following. This just replaces the ExampleCommand with a "do nothing" command.
  public Command getAutonomousCommand() {
    // placeholder do nothing instant command
    return new InstantCommand();
}From the command pallet type "build" and select "WPILib: Build Robot Code"
TODO: Check for errors. List common errors here
From the command pallet type "deploy" and select "WPILib: Deploy Robot Code". For this to work, you need to first be connected to the robot. The robot will need to be powered on and you will need to either connect to the robot's Wifi, or physically connect with an Ethernet cable, or with a USB cable. If you have problems check the WPILib network troubleshooting guide.
TODO: list common problems here.
-
VS Code
-
GitHub
- pushing a new repo to GitHub.com: https://gist.github.com/c0ldlimit/4089101
- about remote repos: https://help.github.com/en/github/using-git/managing-remote-repositories
The next thing to try is to download the team's current robot code and building that.
Start by creating a new window. In VS Code open a new window (Control-Shift-N) and then in the command palette type "git clone" and give the URL https://github.com/FRC-Sonic-Squirrels/2020-RobotCode.git
Much of the code that interfaces directly with the robot's hardware (motor controllers and sensors) is supplied by the manufacturers of those device. To make use of those devices on your robot, you will need to download and install the 3rd party software. VS Code has a function "Manage Vendor Libraries" that can be access through the WPILib command pallet. Check this comprehensive list of 3rd party software.
Chances are your robot will use sensors and motors from Rev Robotics, Cross the Road Electronics (CTRE), or both. Here are the instructions for installing these two major 3rd party libraries.
Go to the "JAVA API Installer" section on https://www.revrobotics.com/sparkmax-software/ and follow the instructions.
- In VS Code, open a project and from the command pallet choose "Manage Vendor Libraries", check "install new (online)", and then enter this url: https://www.revrobotics.com/content/sw/max/sdk/REVRobotics.json
-
Download latest installer from https://github.com/CrossTheRoadElec/Phoenix-Releases/releases and run it.
-
Then in VS Code, open a project and from the command pallet choose "Manage Vendor Libraries", check "install new (offline)", and then select CTRE.